
Table of Contents
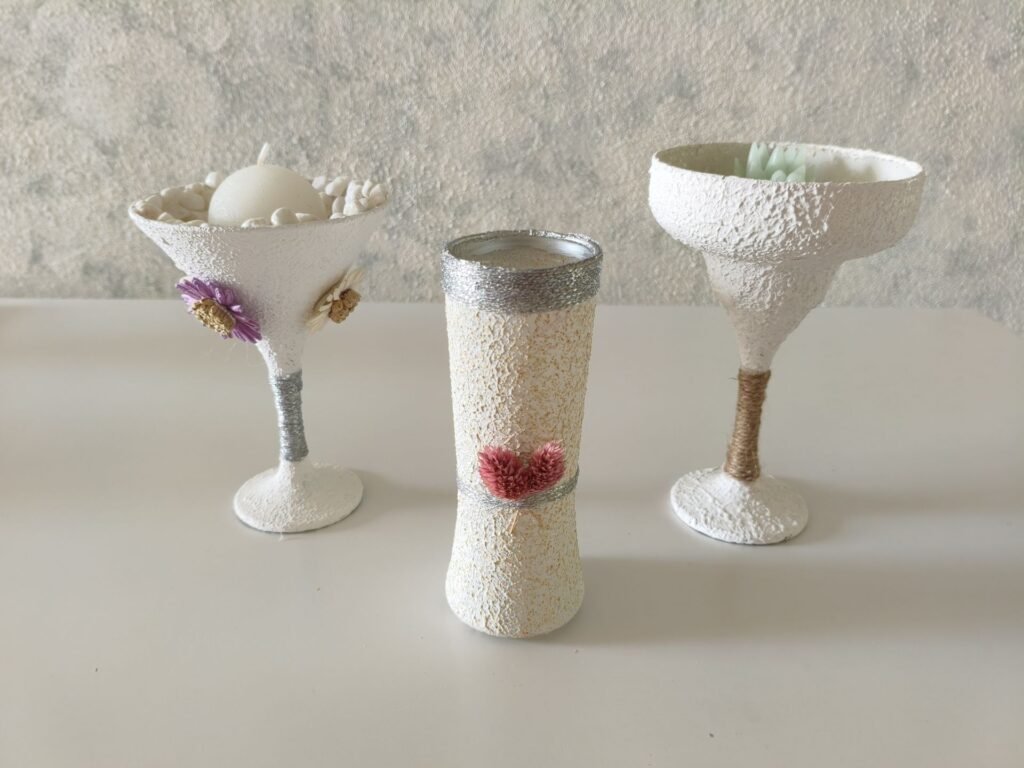
Want to give an old glass bottle or jar a beautiful new look? Create your own DIY glass vases with this easy and affordable decorating idea. With a few simple materials and a little creativity, you can turn ordinary glass into unique home décor! The putty gives the glass an amazing textured finish that makes it look completely different, while a little acrylic colour brings the whole piece to life. It’s one of those unique DIY idea that makes you look at an ordinary glass and think, “Wait… I can make something beautiful out of this!”
Want to learn more about putty? Read more on Wikipedia.
Materials
- Glass vase or glass bottle
- Wall putty
- Acrylic colour
- Mixing container
- Spatula or palette knife
- sponge
- Sandpaper (if you want to smooth certain areas)
- Protective gloves
How to Decorate the Glass
- Clean the glass: Wash the vase and make sure it is completely dry and free from dust.
- Prepare the mixture: Mix well the wall putty with your chosen acrylic colour.
- Grab a sponge: Dip a clean sponge into the mixture and gently dab it onto the glass. Don’t brush it on—the dabbing motion is what creates that beautiful rough, textured surface.
- Build the texture: Continue dabbing the mixture over the glass until you have the texture and coverage you like. You can add more layers for a stronger effect.
- Let it dry: Leave the vase undisturbed until the putty is completely dry.
- Add your finishing touches: Once dry, add extra colours, details, or decorative effects to make your vase truly unique.
- Enjoy your DIY glass vases: Your ordinary glass vase has now been transformed into a beautiful textured piece of home décor!
What to Avoid
- Don’t apply a very thick layer: Thick layers take longer to dry and can crack more easily.
- Don’t overload the sponge: Use a moderate amount of mixture and build the texture gradually.
- Don’t rub the sponge: Dab gently rather than rubbing, otherwise you may lose the textured effect.
- Don’t keep working on drying putty: Once it starts to dry, leave it alone rather than trying to smooth or reshape it.
- Don’t rush the drying time: Let each layer dry completely before adding another one.
- Don’t skip cleaning the glass: Dust, grease, or moisture can prevent the putty from adhering properly.
- Don’t forget to protect your work area: Wall putty can be messy, so cover your surface before you start.
Make It Your Own
This is where you can really have some fun! Once your vase has its textured base, you can decorate it with almost anything you like. Try adding dried flowers, decorative threads, ribbons, beads, shells, or even small pieces of fabric. You can also experiment with different colours and textures to create a completely different look. There are no rules here—just let your creativity take over and turn a simple glass vase into something that feels completely yours!
My Experience
One thing I have learned through the years is that you don’t need to spend a lot of money to make your home beautiful and unique. Sometimes the most ordinary things can become the most special ones when you add a little creativity. Those simple DIY glass vases is a perfect example—you start with something inexpensive and turn it into a piece of décor that looks completely different and truly feels like your own. So before you buy something new, look around your home and see what you already have. With this unique DIY idea you might be surprised by what a little imagination can create!
Want a visual guide? See my YouTube tutorial: From Simple Glass to Beautiful Vase: Easy DIY Home Decor Idea.
Leave a Reply